Complete Guide to GH5 Anamorphic Shooting
#SqueezeLife
Anamorphic. The holy mecca of cinematography. For virtually all DSLR shooters, shooting anamorphic was impossible or highly improbable. You’d have to rig a combination of an anamorphic lens, two clamps, and a prime lens to your DSLR. Then you’d have to desqueeze it to about the height of your pinky nail (or in actuality roughly 3.56:1).
Well those days are long behind us now. Welcome to the GH5 (and its anamorphic shooting modes). All you need is a lens and a PL adapter, then you’re ready to shoot. Well, almost ready.
This guide will help you kick it into cruise control and get to shooting A.S.A.P. (Anamorphic Soon As Possible). It’ll break down the ins and outs of shooting anamorphic on a GH5 or GH5s. This is the product of hours of research and days of testing/shooting projects.
For an abridged version, check out the youtube video below:
Requirements
Adapts the PL anamorphic lenses to the Micro Four-Thirds GH5 sensor
Cage and rods with rod adapter and lens support
Rods are required for a “lens support” to support the anamorphic glass. They’re heavy lenses that need to be supported for equipment safety.
V60 or above SD card (V90 for HFR and bitrate options)
V60 minimum required for shooting anamorphic
Allows for HFR and high bitrate options
Highly recommended…
External monitor with “Anamorphic Desqueeze” feature built-in
I recommend FeelWorld F6. This needs to be built-in because GH5 does not output desqueezed HDMI footage. It only outputs the stretched 4:3 footage.
Matte box
Great for holding filters and controlling light. This is especially useful for holding/stacking ND filters for outdoor use. I use the Bright Tangerine Misfit, but you can use any well-reviewed mattebox.
Skim down on outdoor light. Get either 4x4 or 4x5.65 depending on your matte box size.
Top handle
Helps you shoot at different angles and use an Easyrig
Shoulder rig or Easyrig
Helps achieve certain shooting style and relieves the weight of the rig. Once the camera is fully kitted out, the rig is pretty heavy (6-8lbs)
Lenses
So when deciding lenses, before anything, decide if anamorphic is right for the project. Do NOT use a higher budget as an excuse to rent 2x vintage anamorphics when the client wants a clean corporate look. Also keep in mind that anamorphic lenses tend to have a further close focus distance (usually ~3 feet).
2x or 1.33x
Decide if you want to shoot 2x anamorphic or 1.33x anamorphic. The 2x squeeze will take your image and squeeze it down to a 2.39:1 super widescreen output. While the 1.33x will squeeze it less, leading to a 16:9 output. This is a huge benefit to the GH5 open gate sensor. It allows for true 4:3 anamorphic shooting that desqueezes into near-standard ratios, with about 10% wider output than expected. This means your 2x anamorphics will output about 2.66:1.
Characteristics
Are you shooting for a sci-fi, blue flare look? Or maybe a warmer vintage look? Do you want a lot of flaring or minimal flaring? Do your research and pick the best options for you. There’s quite a few options — cheaper anamorphics tend to have a coating that causes blue flares, while higher end options have more favorable characteristics.
Crop Factor
Since you’re shooting on a micro four thirds sensor, the lenses are going to be cropped in a bit — but not as much as you think. The GH5 uses the entire 4:3 sensor when shooting anamorphic, so after a bunch of math, the final conversion ratio is about 1.4x crop on average. To get the exact numbers with your lenses, use this link:
Anamorphic Desqueeze Calculator
This calculator calculates hFOV (horizontal field of view) for anamorphic adapters, but it also works great for true anamorphic lenses. Just read the hFOV output as vFOV (vertical FOV) instead. Divide the hFOV by 2 if you’re using true 2x anamorphic lenses to get your actual hFOV. This is also only 0.22x crop difference between GH5 and RED anamorphic crop (RED: 15.8mm sensor, GH5: 13mm sensor) — which is pretty impressive considering the price tags!
(Image courtesy of Atlas Lens Co.) Anamorphic lenses take in more information horizontally. 2x anamorphics take the lenses focal length (such as 50mm) as it’s vFOV and 1/2 the focal length as its hFOV (25mm). Fascinating, right?
Kitting out GH5
Attach the camera in the cage to the rods with lens support propping up the lens. Set up any accessories (matte box, filters, mic, monitor etc) then attach it to an easyrig, shoulder rig, tripod etc. Try to distribute your camera build weight for better balanced shooting. You can even rig together a V-mount option on the rods to even things out. So many possibilities!
Settings Anamorphic Settings
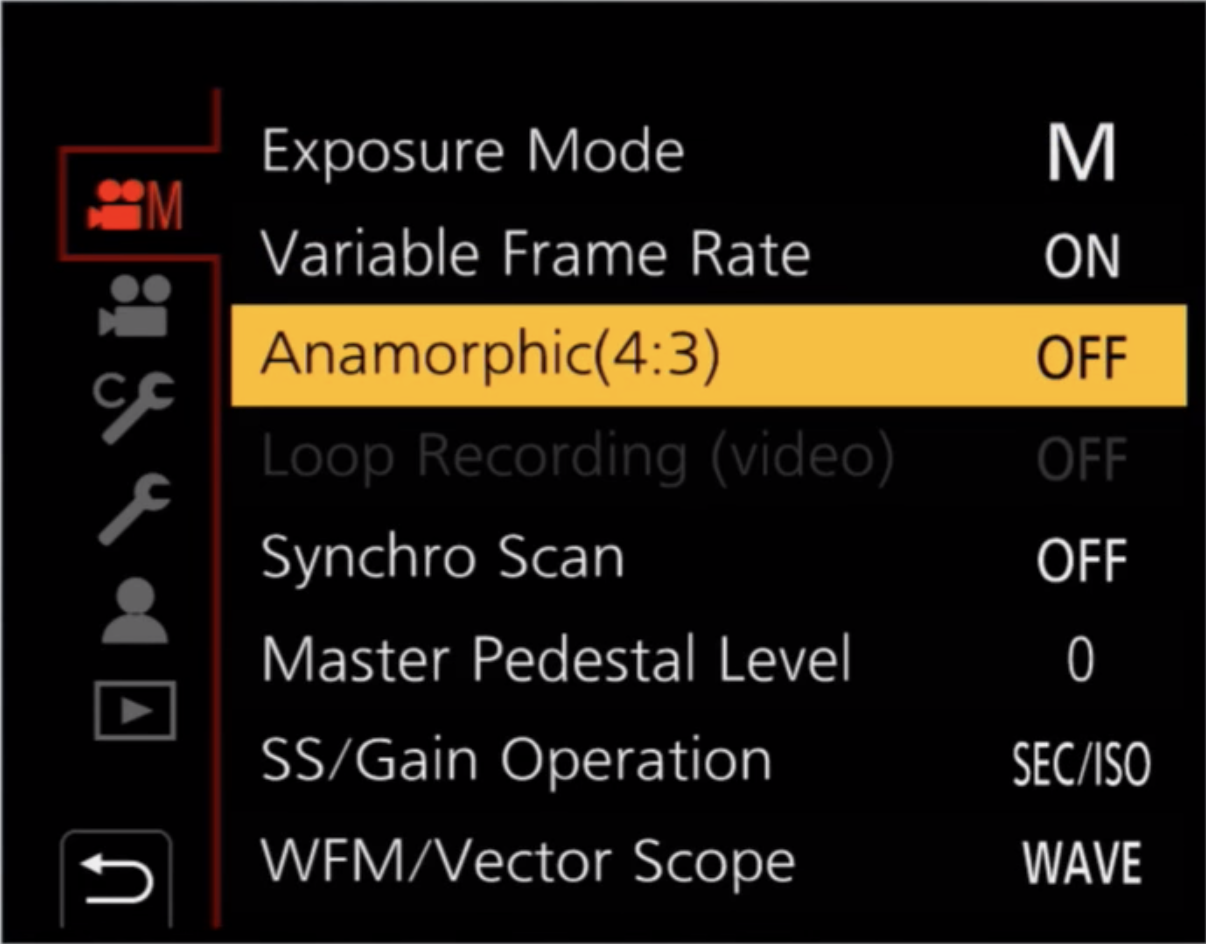
The first page has Anamorphic (4:3) option. Second page has anamorphic desqueeze option (for monitoring desqueezed footage).
In the GH5 settings, activate “Anamorphic Desqueeze Display” on Page 2/2 of the first Video Menu. Then go to Page 1/2 and activate “Anamorphic (4:3)” mode. Select your anamorphic bitrate and frame rate. Then you’re good to go.
If you’re using monitor…
Set up your monitor to desqueeze as well. For the Feelworld F6, this can be done by going into the settings menu and setting anamorphic mode to 2x, 1.33x or off.
***
This is really about having the right gear and preparation, then focusing on the creative side of the project. Remember that all of this comes secondary to the vision of the project. Creative vision is more valuable than any equipment.
Happy anamorphic shooting!

