Quick Tips: Speed Ramping in Adobe Premiere
If you’re looking to change the speed of a clip without it being choppy, Adobe Premiere’s Time-Remapping feature has you covered. Here’s a quick tutorial on it.
Goal: Change speed of a clip smoothly
Difficulty: ☆☆
Time: < 5 minutes
Step 1: Interpret Footage as 23.976

Right clip your clip in the project window. Select modify -> interpret footage. Here you want to interpret the frame rate from high speed (59.94fps or higher) to 23.976fps.

Step 2: Time Remapping Tool
Right click the Fx icon on the clip. Then go to time remapping —> speed. Then change to the pen tool by clicking p (or your keyboard shortcut) or by selecting it from the toolbar.

Step 3: Slow Down Area
Click the point where you want to slow down. This will create a time remap area, where the time can be different on both sides of the point. Use those two handles on the point to extend the time you want it to slow down/speed up during.


Step 4: Slow Down/Speed Up
Click v for arrow tool (keyboard shortcut) or select from the toolbar. Grab the line on the side you want to adjust speed. Then manipulate the speed by dragging up (speed up) or down (slow down).
Step 5: Remove Time Remap (Optional)
If you change your mind, you can remove the time remap by selecting one handle and deleting it (press delete). Then select the original point of remapping and delete that. You may need to adjust the speed of the clip now by changing to arrow tool (press v). Then adjust speed by grabbing the line and adjusting to 100%.
Bonus: Audio
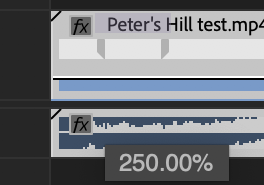
Audio does not speed ramp, only video works with the tool. So you’ll need to mute the audio, sound design it, or change it manually. Some tips for audio designing to slow motion:
First speed up the audio to regular speed. Select the audio by alt-clicking the audio track, then right click speed/duration. Then adjust it to full speed by the slow-ratio (250% if it was 60fps, 500% if it was 120fps, etc.)
Use Pitch Shift effect and Lowpass to simulate speed change of audio.
Include SFX like risers, whooshes, and impacts to sell the effect of slowing and speeding footage. Freesound.org and Youtube are great resources for finding SFX.